Kodi is a favorite media center for streaming Live shows, movies, and sports. But there’s one devil that spoils the mood. Yes, I’m talking about buffering which is one of the worst things you can experience when streaming your favorite movies. With this simple step-by-step guide, you’ll know how to fix buffering on Kodi.
As Kodi Leia 18.5 is the latest Kodi version, I’ll be focusing this how to guide according to it.
However, you don’t have to worry.
The steps are quite similar to all Leia, Krypton and Jarvis. Alternately, you can also check this guide to fix buffering on Kodi 16 Jarvis.
Now before we proceed, let me tell you a few reasons that might be causing your videos to buffer:
Reasons why you may be encountering Buffering on Kodi
1. Low Internet Speed
The main reason why you may be having buffering issues on Kodi is naturally low internet speed. Live streaming requires high-quality speed connectivity and if your net connection is slower than 10Mbps, then you will have the buffering problem.
Additionally, you can sit near your router and check if there is no heavy downloading or streaming happening on other connected devices. Try to pause them for a while and it may just stop the buffering problem you’re encountering.
2. Problems with the Stream Source
Another reason for buffering on Kodi may be the poor stream source. If the problem is on the server end, then you may try to switch to another stream source that is providing your favorite show.
Or you can download a good VPN like IPVanish. Downloading a VPN will help you attain more internet speed and give access to unlimited bandwidth. Moreover, you can stay secure and experience safe browsing with IPVanish on your system.
Please note that some Kodi streams may be subject to copyright and infringement issues. To protect yourself from such notices, it’d be ideal to use a VPN.
Before You Go any Further, Get Secure
Before you go ahead and use Kodi, it is advisable to download a VPN for your Kodi. A VPN will keep you safe and secure while you stream away and watch your favorite movies online. With a Kodi VPN software on your system, all ISP limitations can be circumvented and you can enjoy access to unlimited and media content and avoid any copyright/infringement notices.

Also, your video stream speed will increase and you’ll definitely want that to enjoy more movies in lesser time without any buffering. So don’t wait up and download the best Kodi VPN today.
For a fully-featured Kodi VPN, you can download IPVanish today. It comes highly recommended and is priced at only $6.49/month for 1 year.
Don’t wait and experience secure browsing with IPVanish Today!
Once you download IPVanish, you’ll see visible changes in your Kodi stream.
Now coming to the 3rd problem let’s get to know what it is and how you can resolve it in just a few steps.
3. Clear your Cache on Kodi
Over the time, cache may accumulate on your Kodi. Although Kodi offers 20 MB of RAM to each add-on for video streaming, there are a few add-ons that override the default settings and create their own cache folders to save the items they can use for later.
Yes, it’s a good thing that Kodi stores a few amount of bits before video stream to push a smooth stream for you. But over the time, this cache can pile up and cause storage issues which leads to buffering on Kodi.
Now you won’t have to encounter this problem anymore, dear friend.
Following this simple guide mentioned below, you can easily learn how to fix buffering on Kodi.
Here’s How to Fix Buffering on Kodi
-
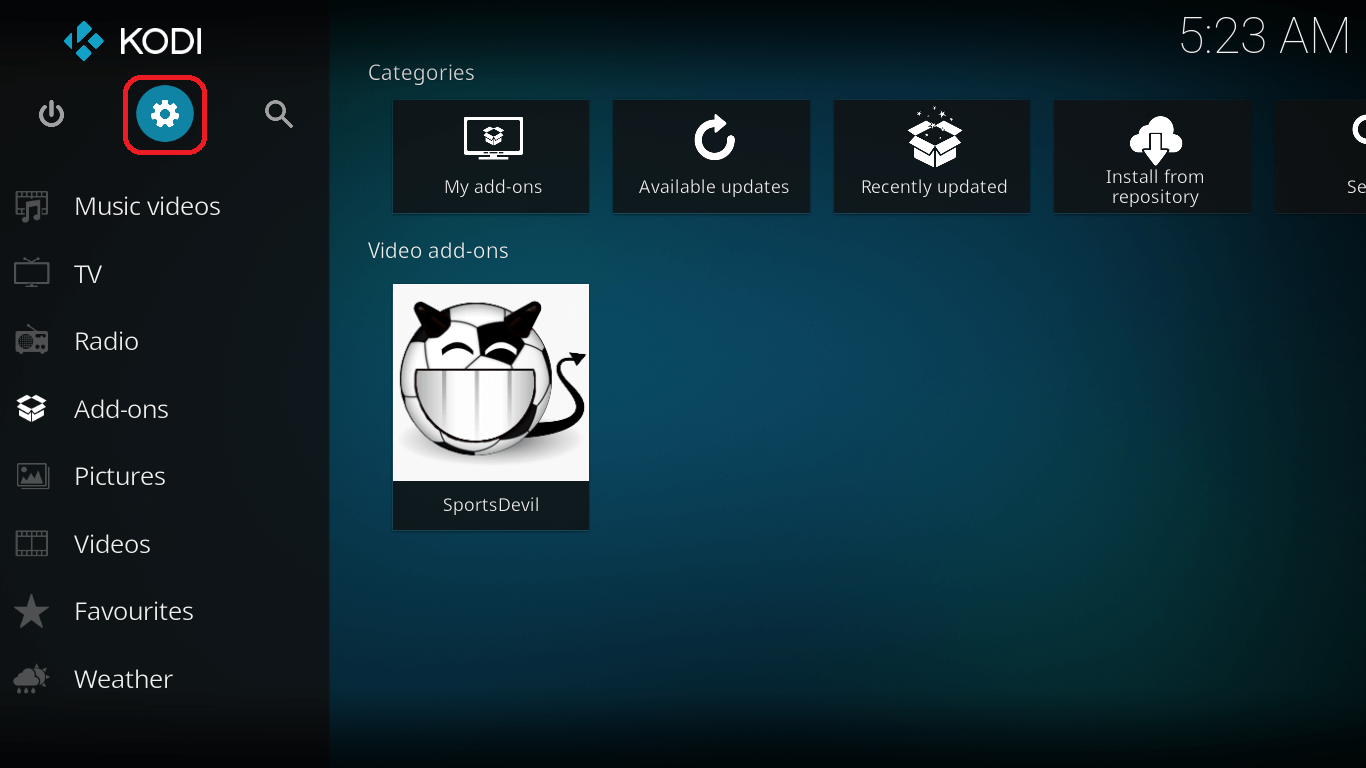
- Step 1: Open Kodi interface on your device.
-
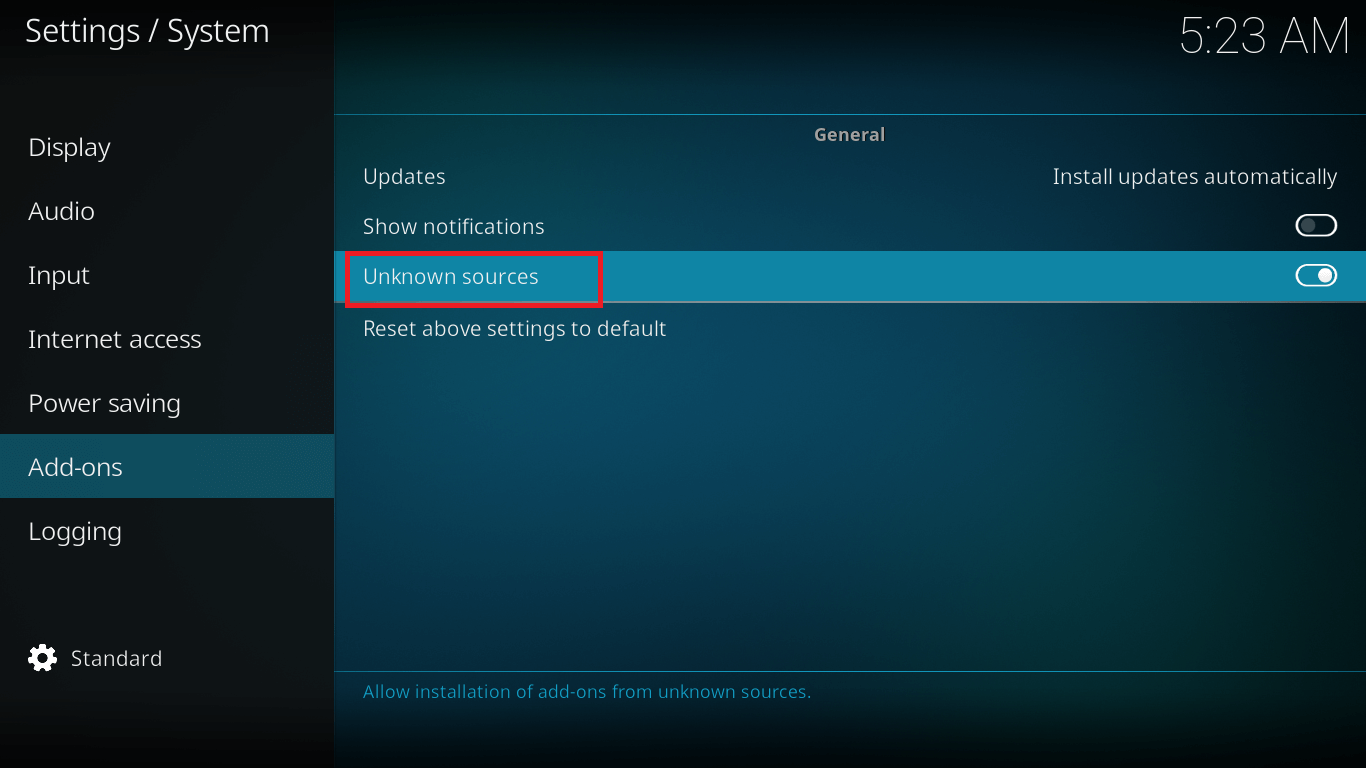
- Step 2: Make sure you have enabled Unknown sources option. If not, go to Add-ons>Settings and enable Unknown Sources.
-
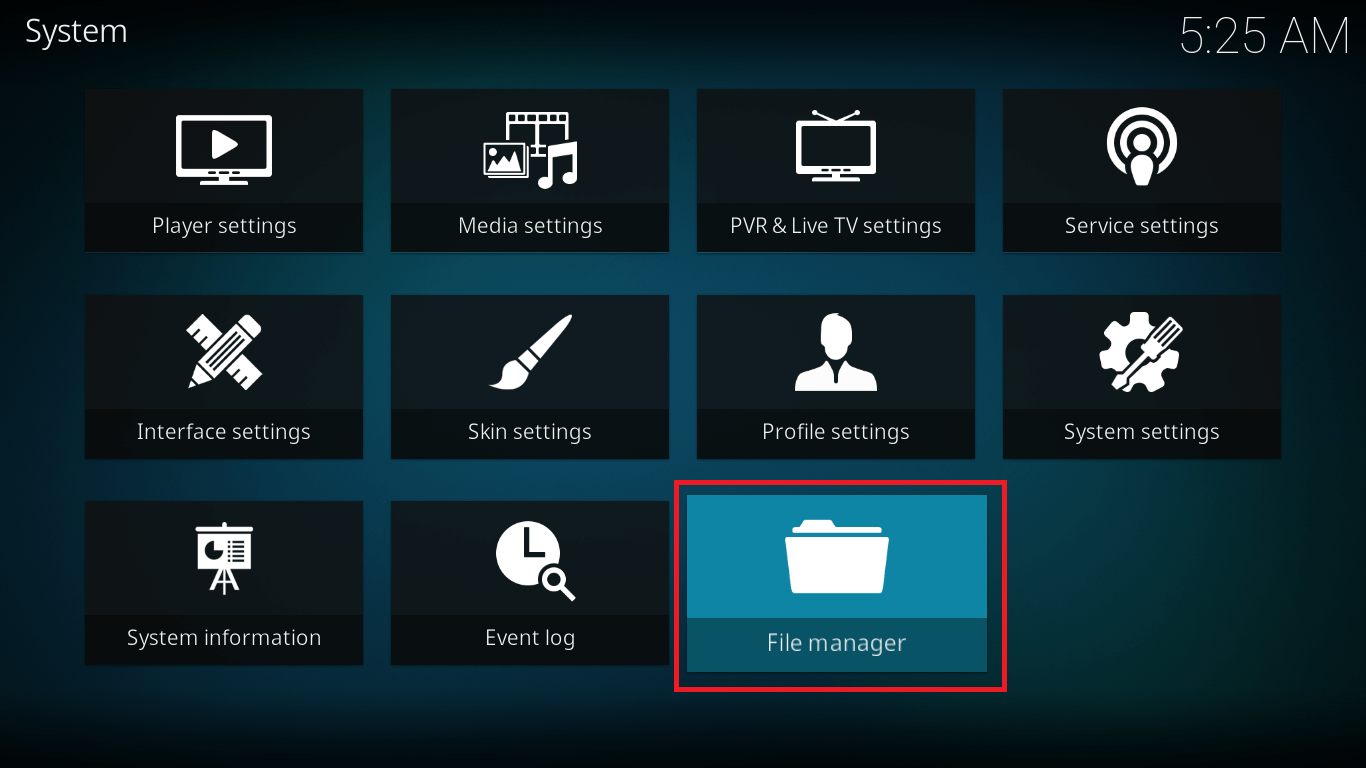
- Step 3: Now go back to the main menu. Click on Settings> File Manager.
-
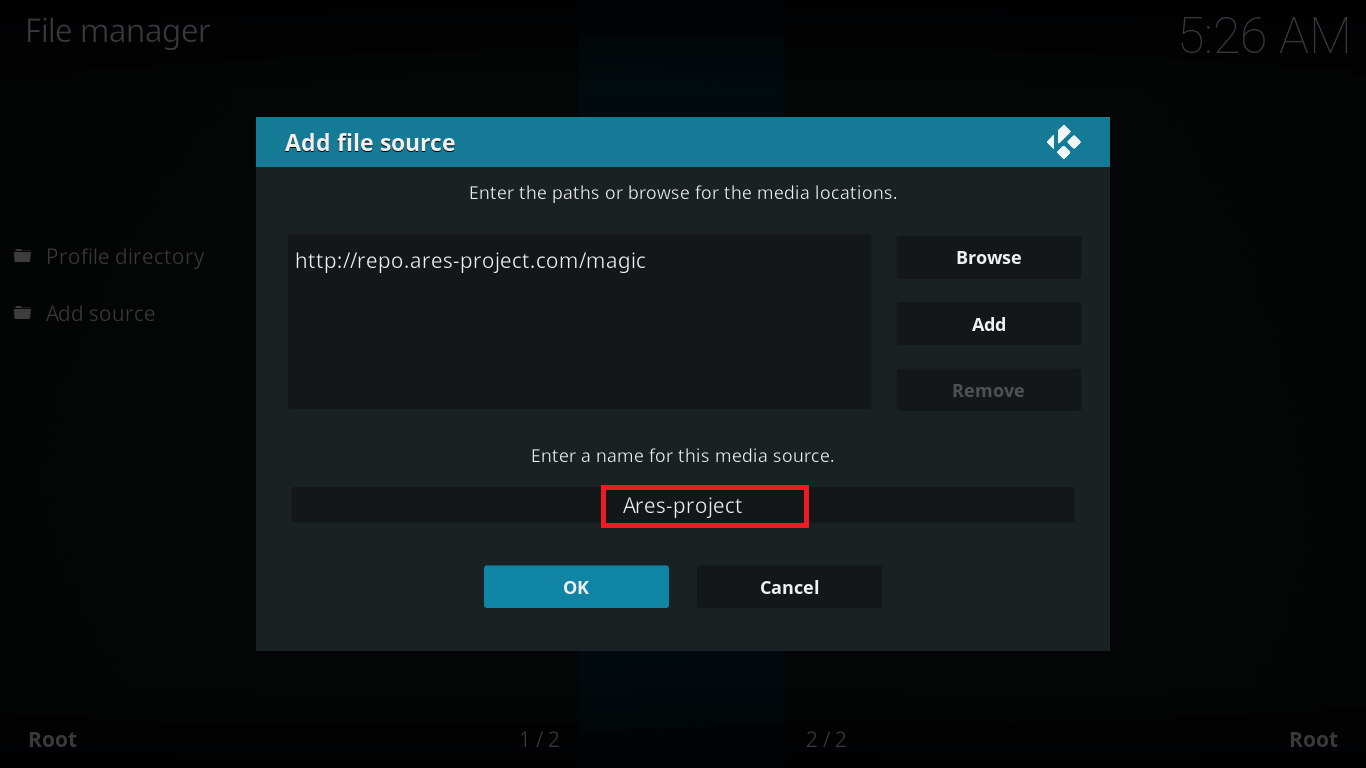
- Step 4: Select Add Source> None and type this link http://repo.ares-project.com/magic/. Make sure the link is typed exactly as mentioned.

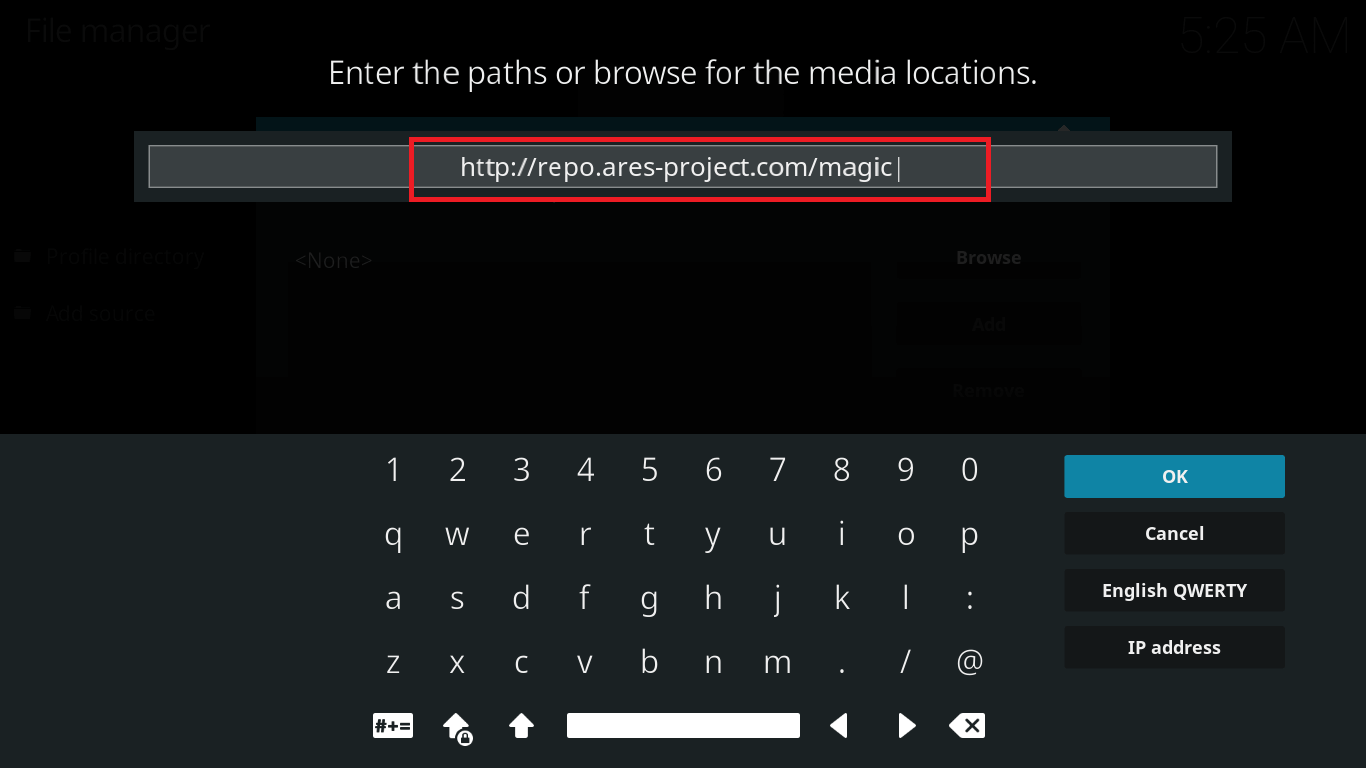
-
- Step 5: In the below box give it any name like “Ares-Project” and click Ok.
-
- Step 6: Navigate to the home screen. Select Add-ons> Add-ons Browser (an open folder icon).
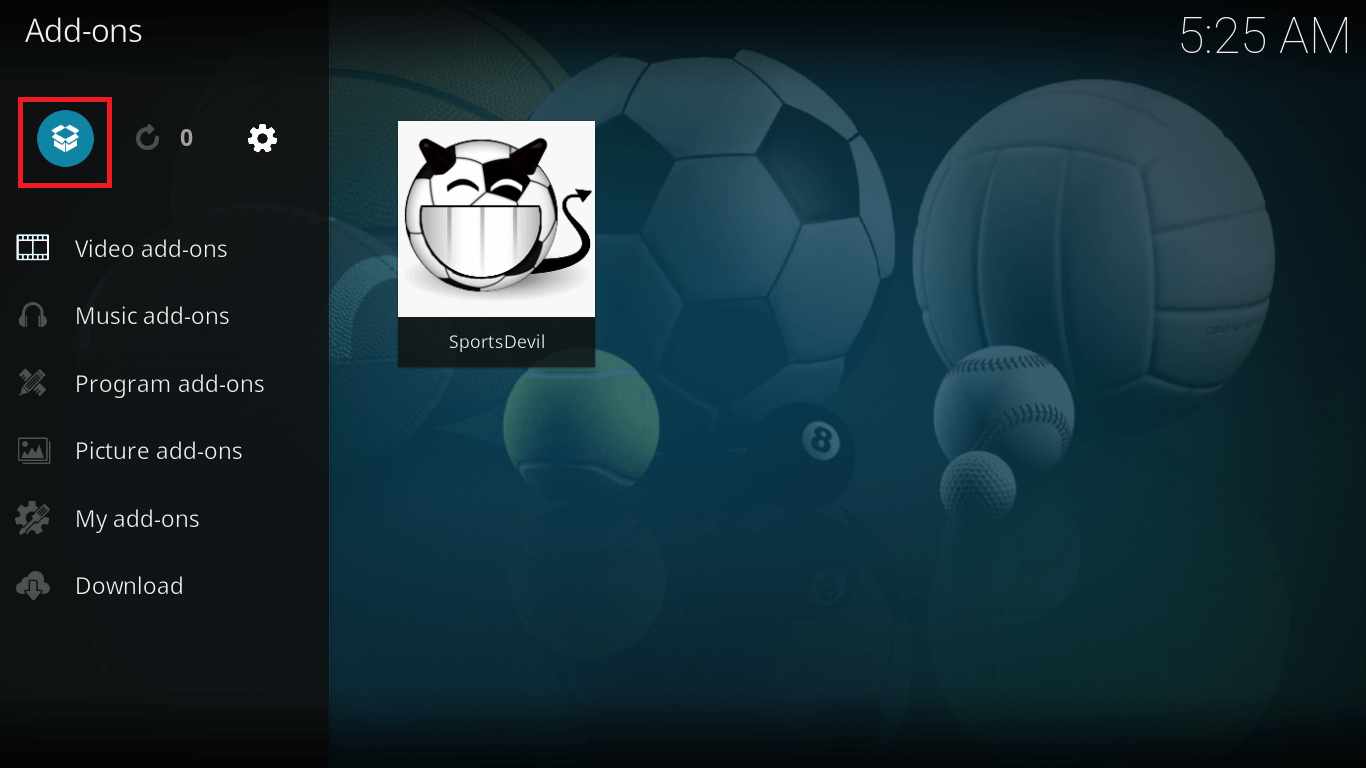
-
- Step 7: Click on Install from zip file option. Select the file named Ares-Project.
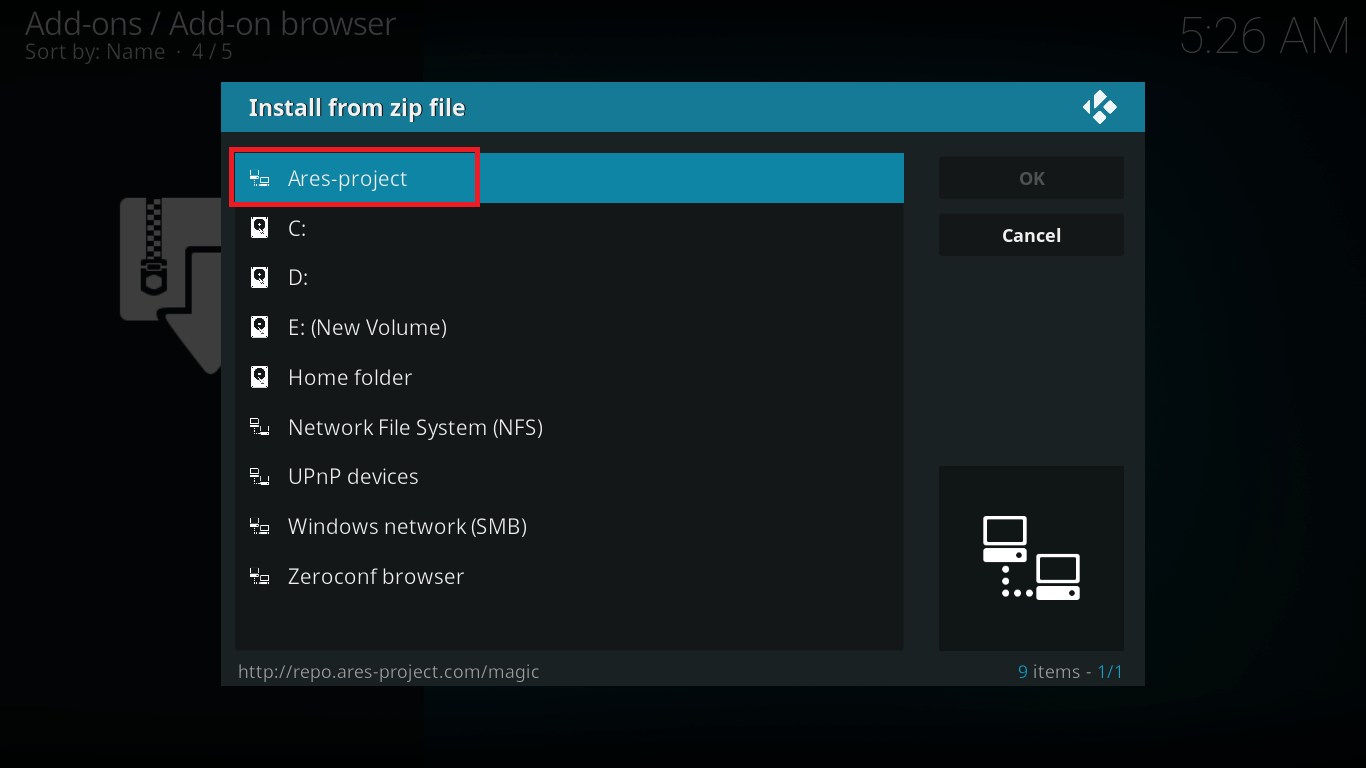
-
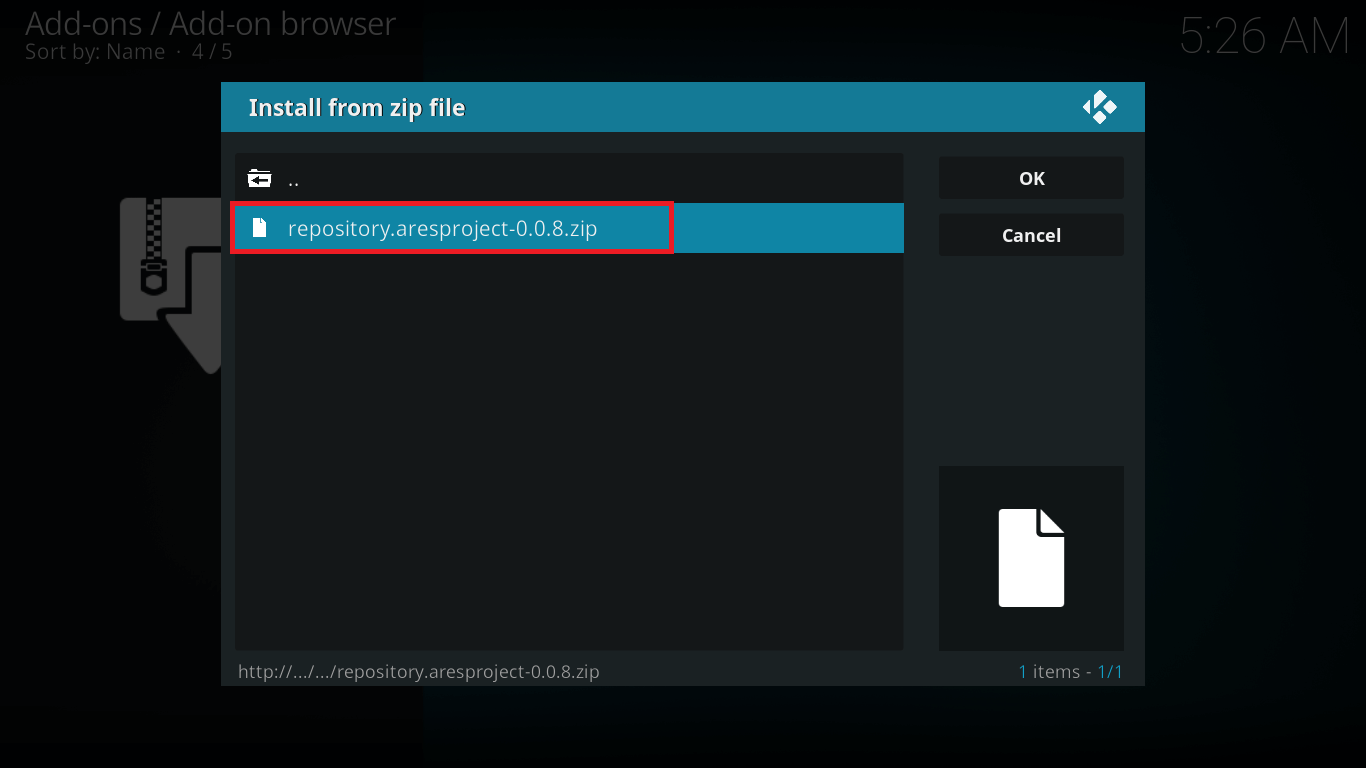
- Step 8: Now click and select the zip file labeled repository.aresproject.zip.
-
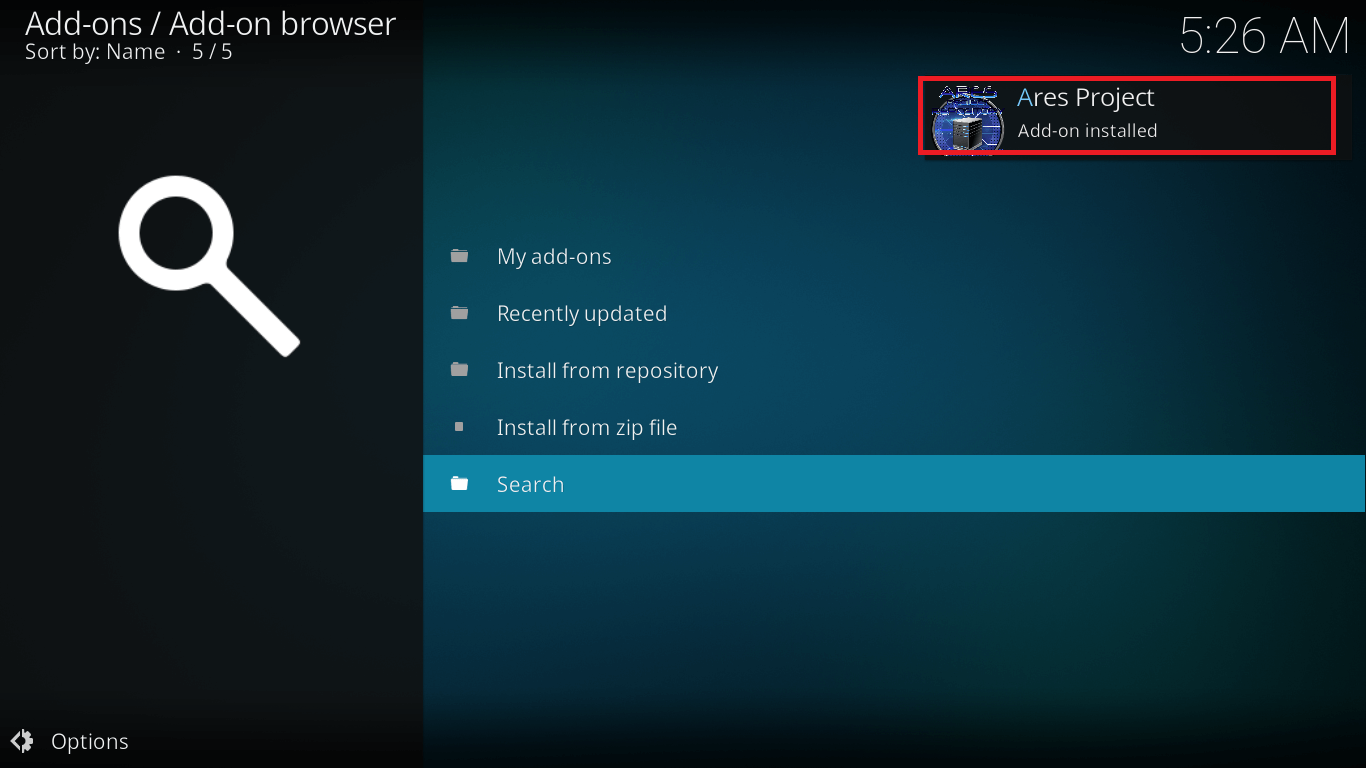
- Step 9: It’ll take a few seconds. Once the notification pop-up comes on your screen, go to the main menu.
-
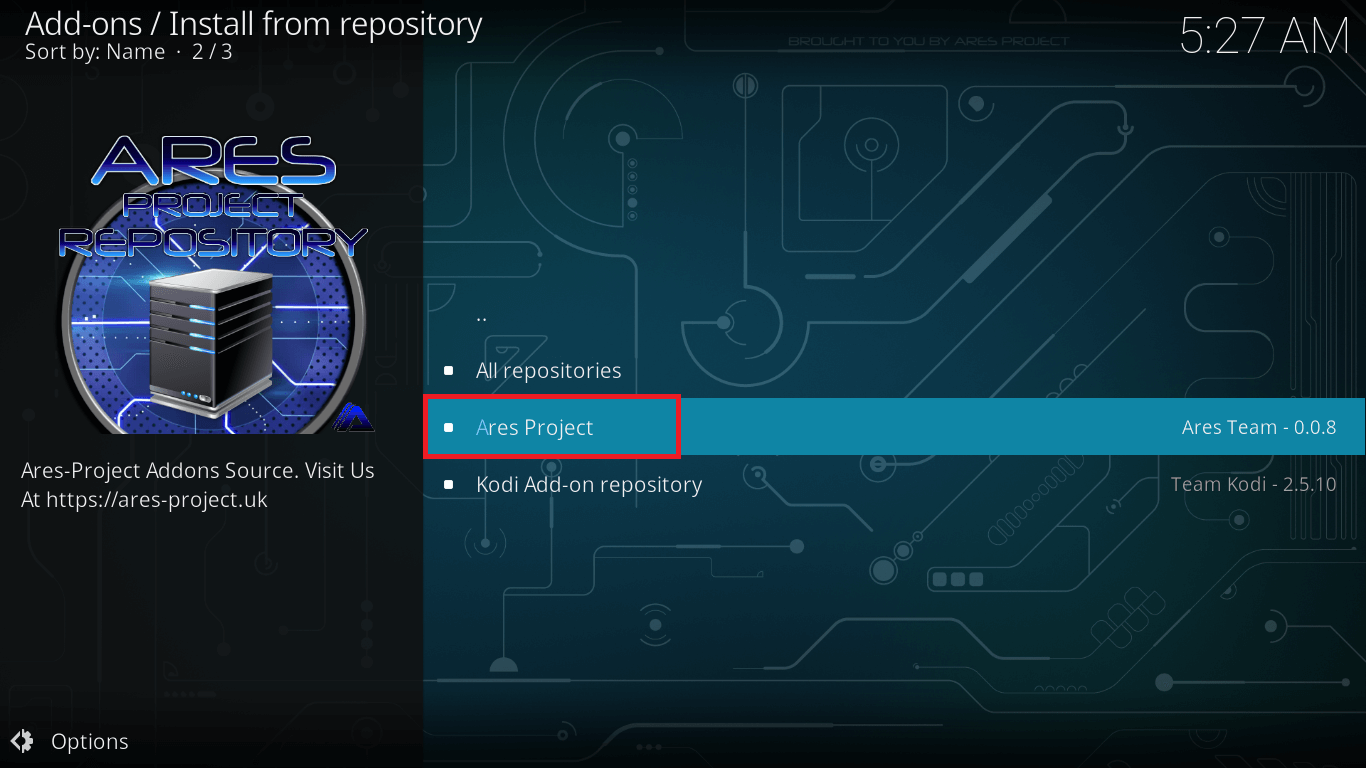
- Step 10: Go to Add-ons> Select Install from Repository and click on Ares Project.
-
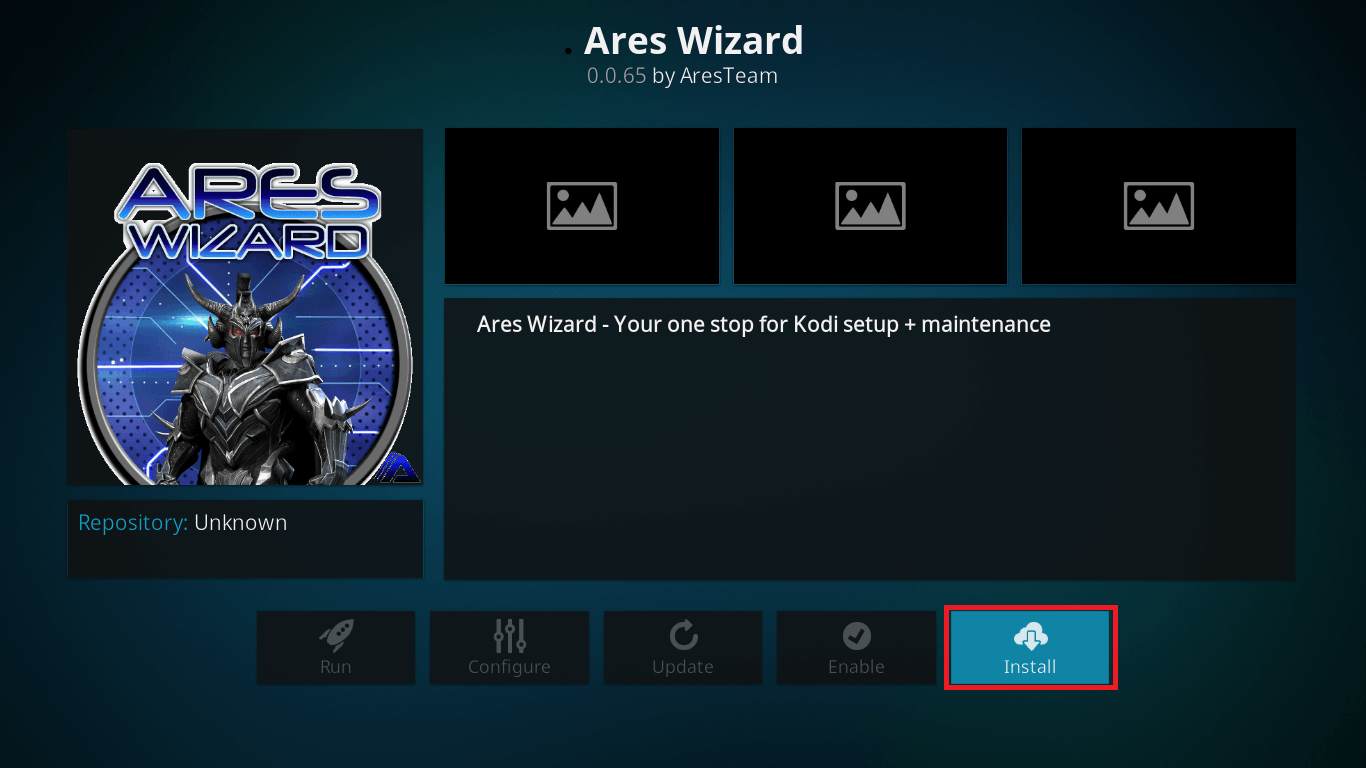
- Step 11: From your main menu, select Program Add-ons> Ares-Wizard>Install.
-
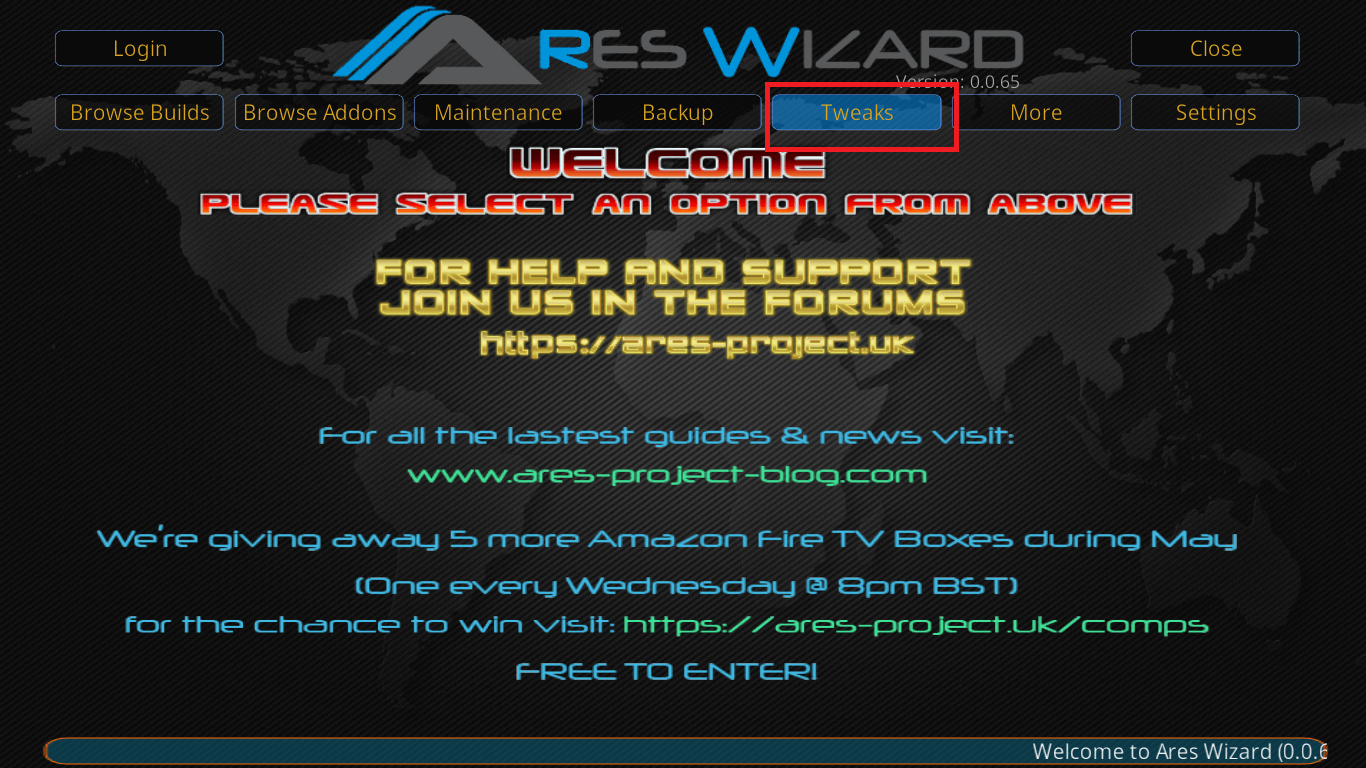
- Step 12: Once the Ares-Wizard launches, go to TWEAKS folder located on the top among other folders.
-
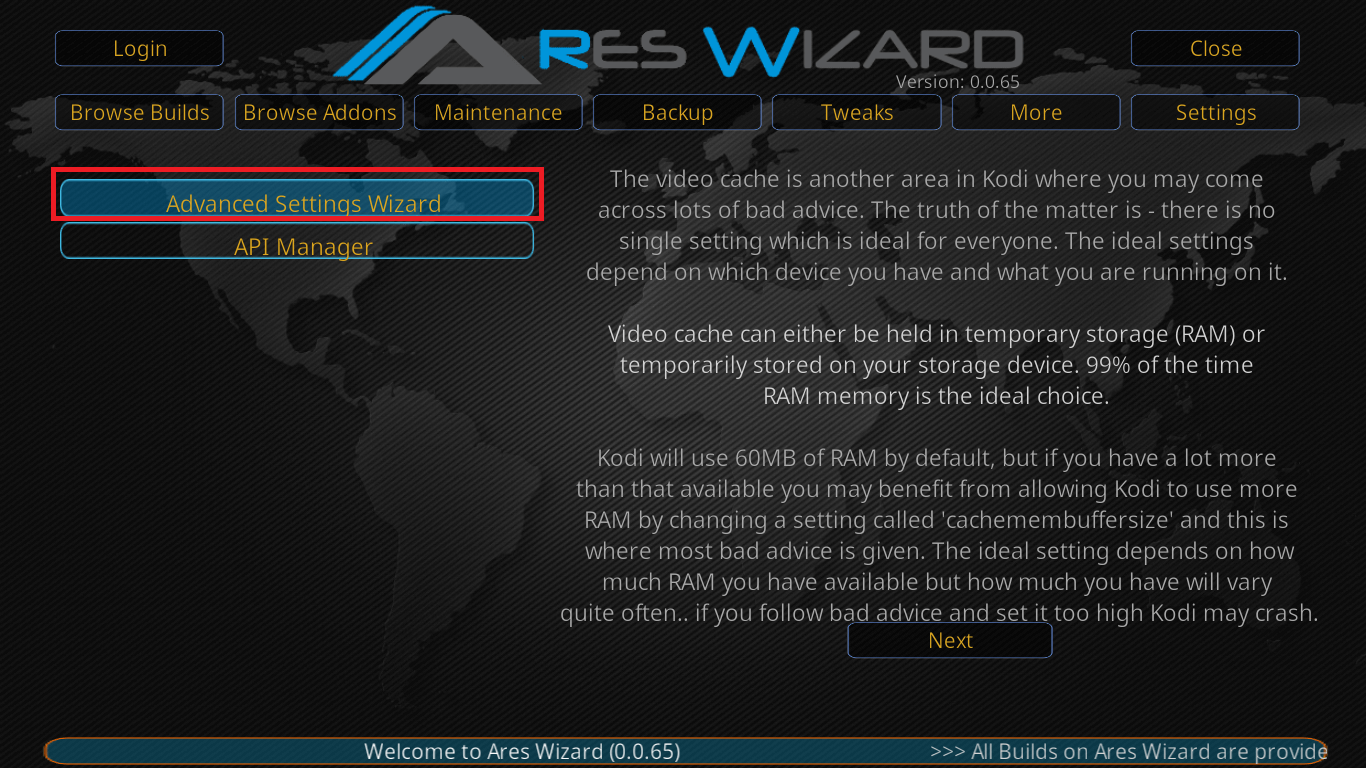
- Step 13: Navigate to Advanced Settings Wizard.
-
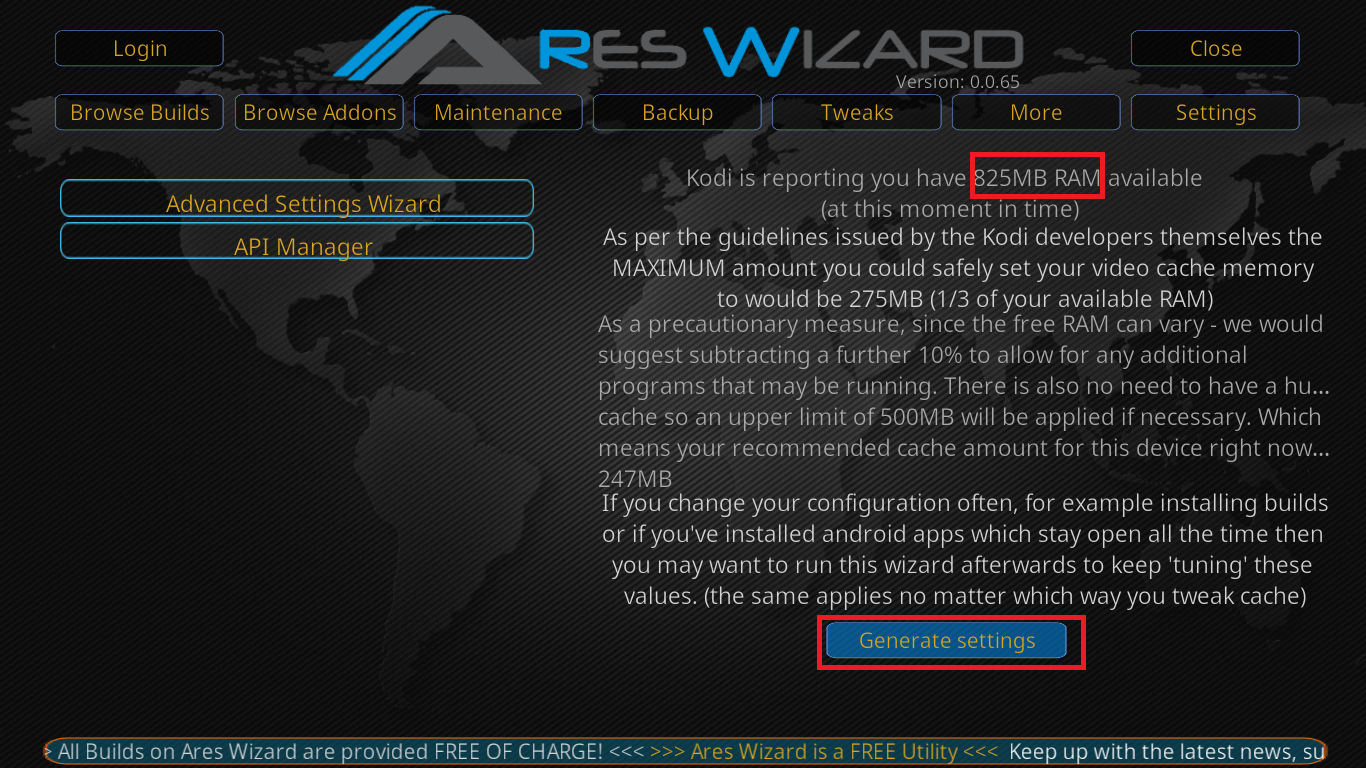
- Step 14: Click Next. You’ll be shown the amount of RAM available for your system.
-
- Step 15: Click on GENERATE.
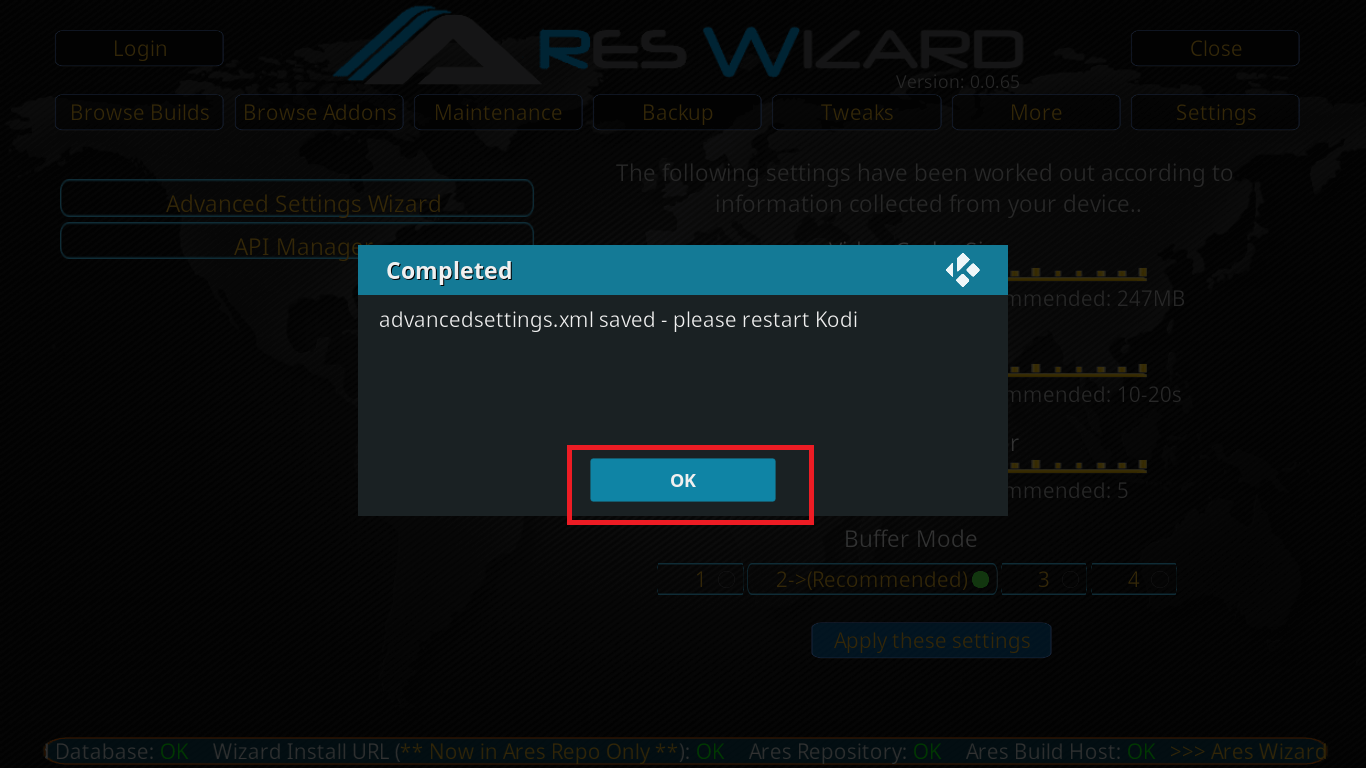
- Step 16: Set the available Video Cache option to half of the available RAM and click on Apply Settings.

-
- Step 17: It’ll ask you to restart your Kodi to implement these changes. Restart your Kodi and you’re good to go.
This is all that you’ll have to do to experience a smooth video streaming with hopefully, much less buffering.
For more about Kodi and other helpful guides, subscribe to us.
Leave a comment down below to let us know if it worked well for you.
Till then, Happy Streaming! 🙂
Disclaimer: Please note that freak sense community does not promote and/or approve of piracy in any way. How you use the information presented to you is ultimately your sole responsibility and you shall be accountable for the same. Also, we do not own any rights or have authority over the software, products and external links mentioned in this post.</>